![]()


![]()
![]()
![]()
![]()
![]()
![]()
![]()
![]()
![]()
![]()
![]()
![]()
![]()
![]()
![]()
![]()
![]()
Ultimate External Water Cooler
For PC
(The Not Too Cheap Version)
![]()
![]()
![]()
![]()
![]()
![]()
![]()
![]()
![]()
![]()
![]()
![]()
![]()
![]()
![]()
![]()
![]()
![]()
![]()
Ultimate External Water Cooler
For PC
(The Not Too Cheap Version)
![]()
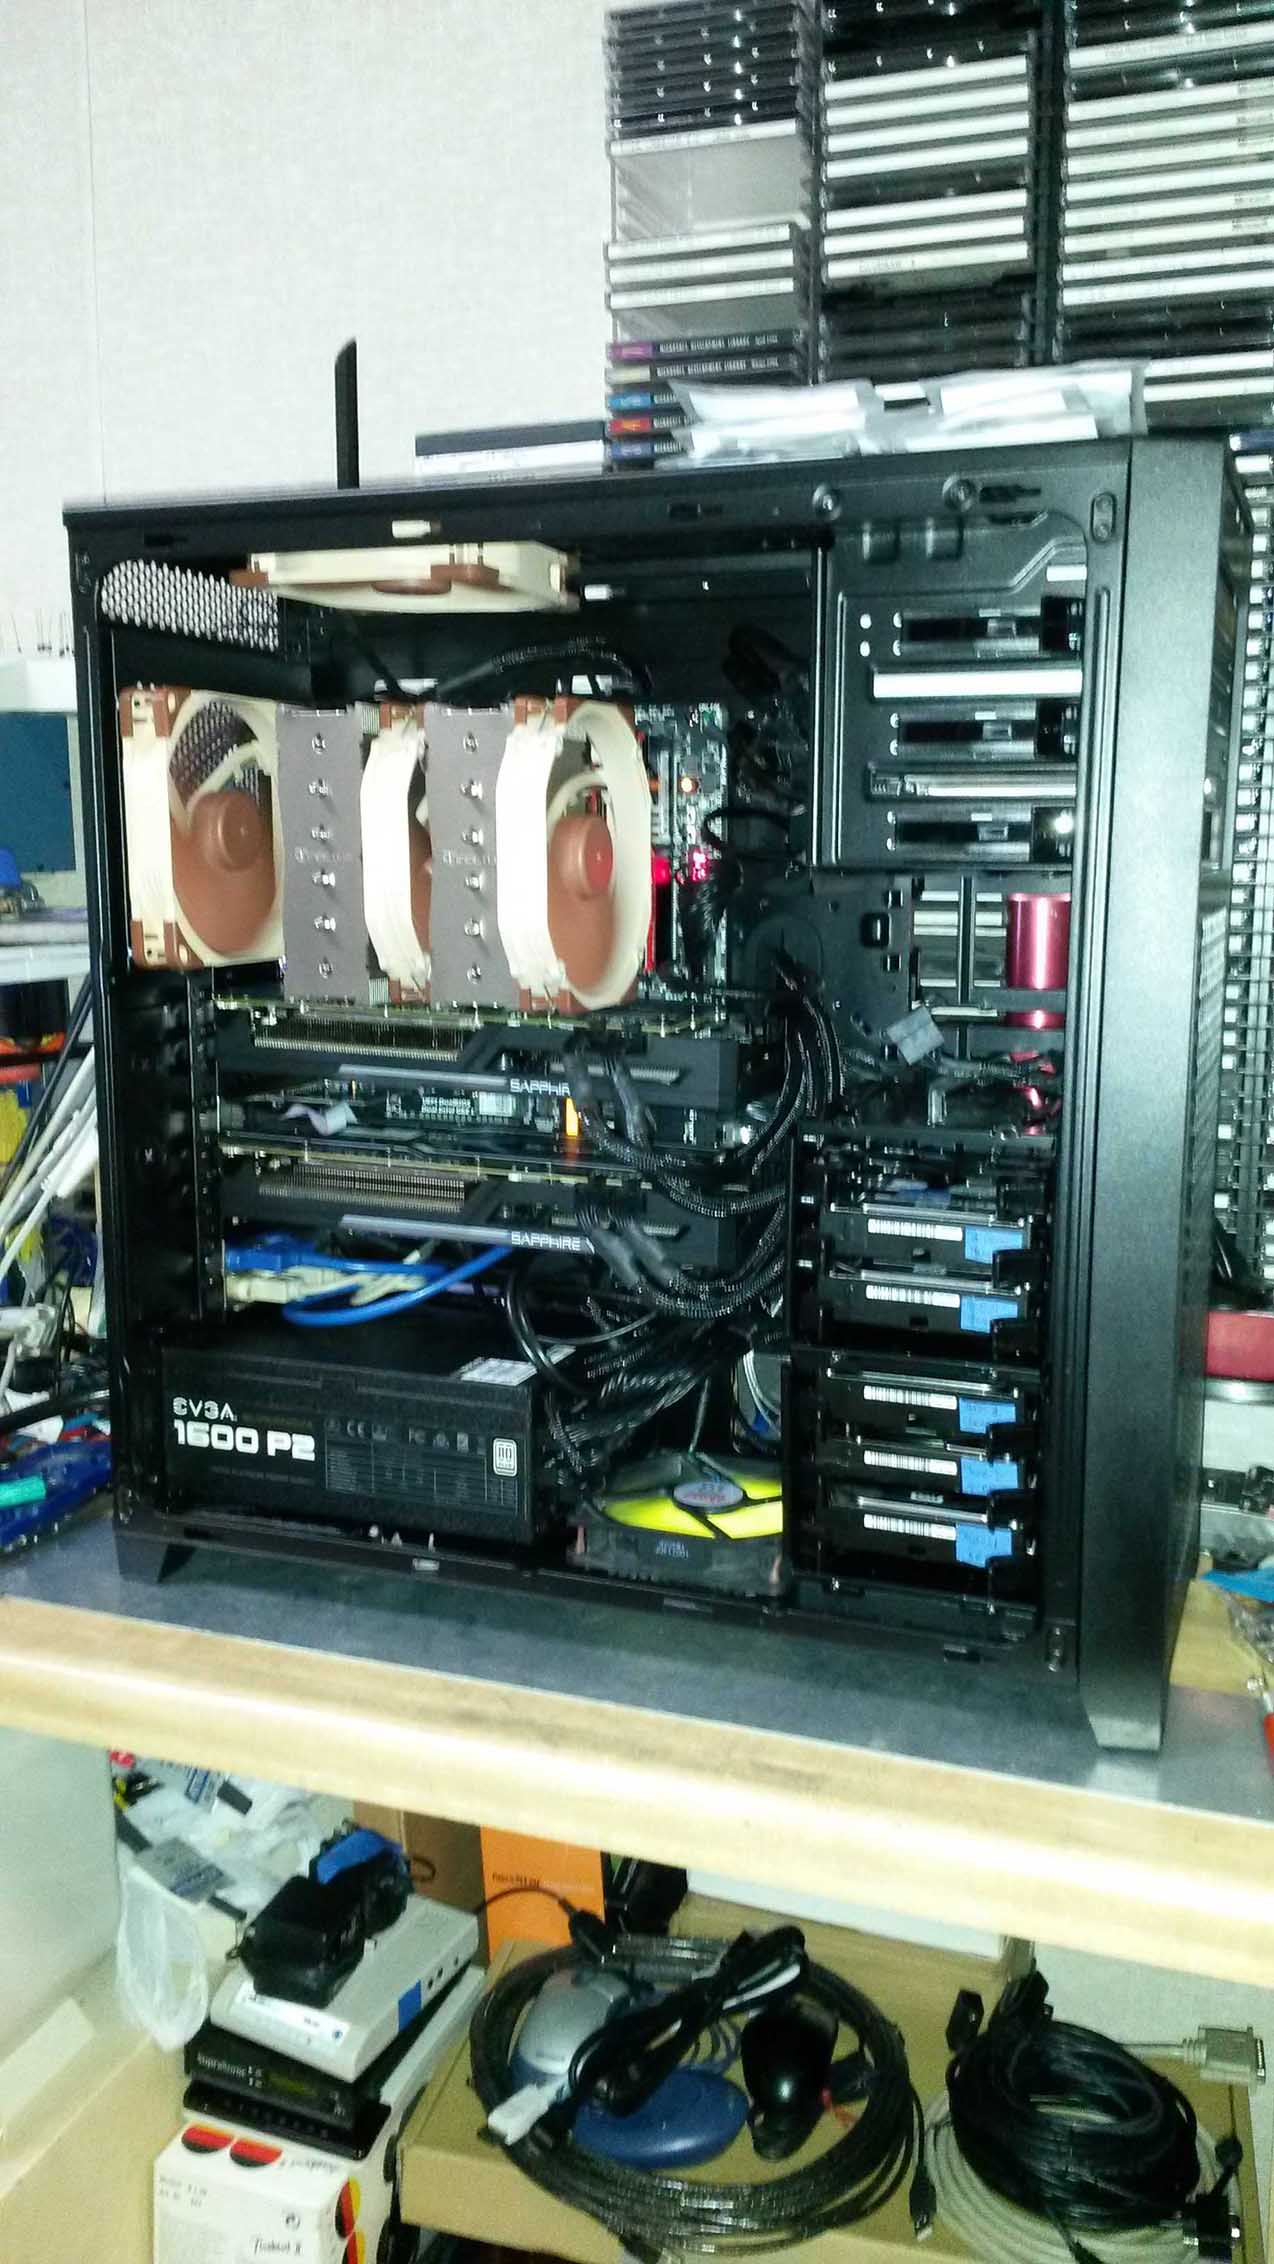
| Because our high performance PC was having cooling issues
when overclocked to the max even with the largest internal air cooling
setup we could put together including 5 case fans, 2 cpu cooler fans and
6 graphic cards fans, we decided to water cool it.
We had thought about an internal cooling system but immediately ran into a space problem with the type of large 480mm cooling radiator we wanted to run at the top of the case. Effectively we would loose our DVD drive bays as well as our solid state drive bay at the top of the case. With that, it was decided to build an external cooling system that would not only serve our immediate needs but future needs as well.
NOTE: To view the photos in full size in either Firefox, Chrome or MS Edge, right click on the photo and then select 'open image in new tab'. Click on the new tab and the photo will appear full screen. Move the cursor over the photo and a plus sign will appear. Left click and the photo will be expanded to a very large full size and the cursor will become a minus sign. Left click again to return to full page size. Click on the X in the tab to close the image and return to the page.
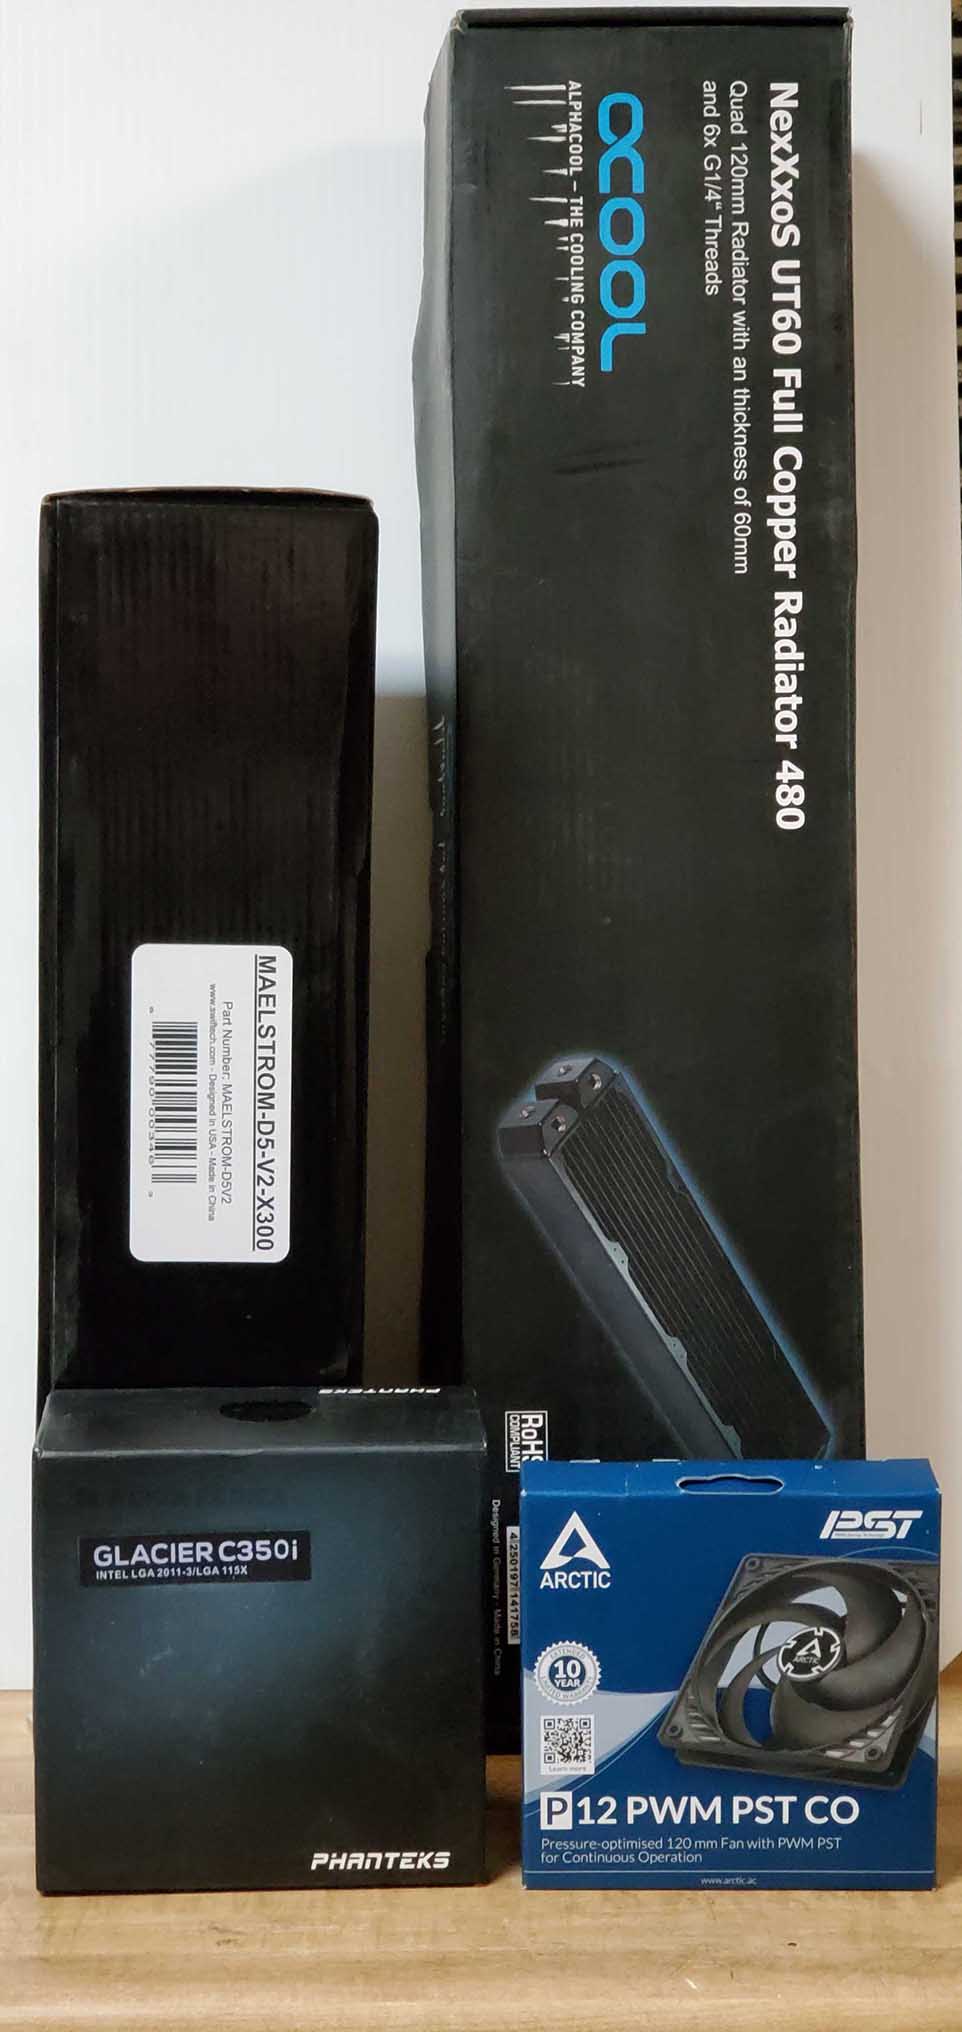
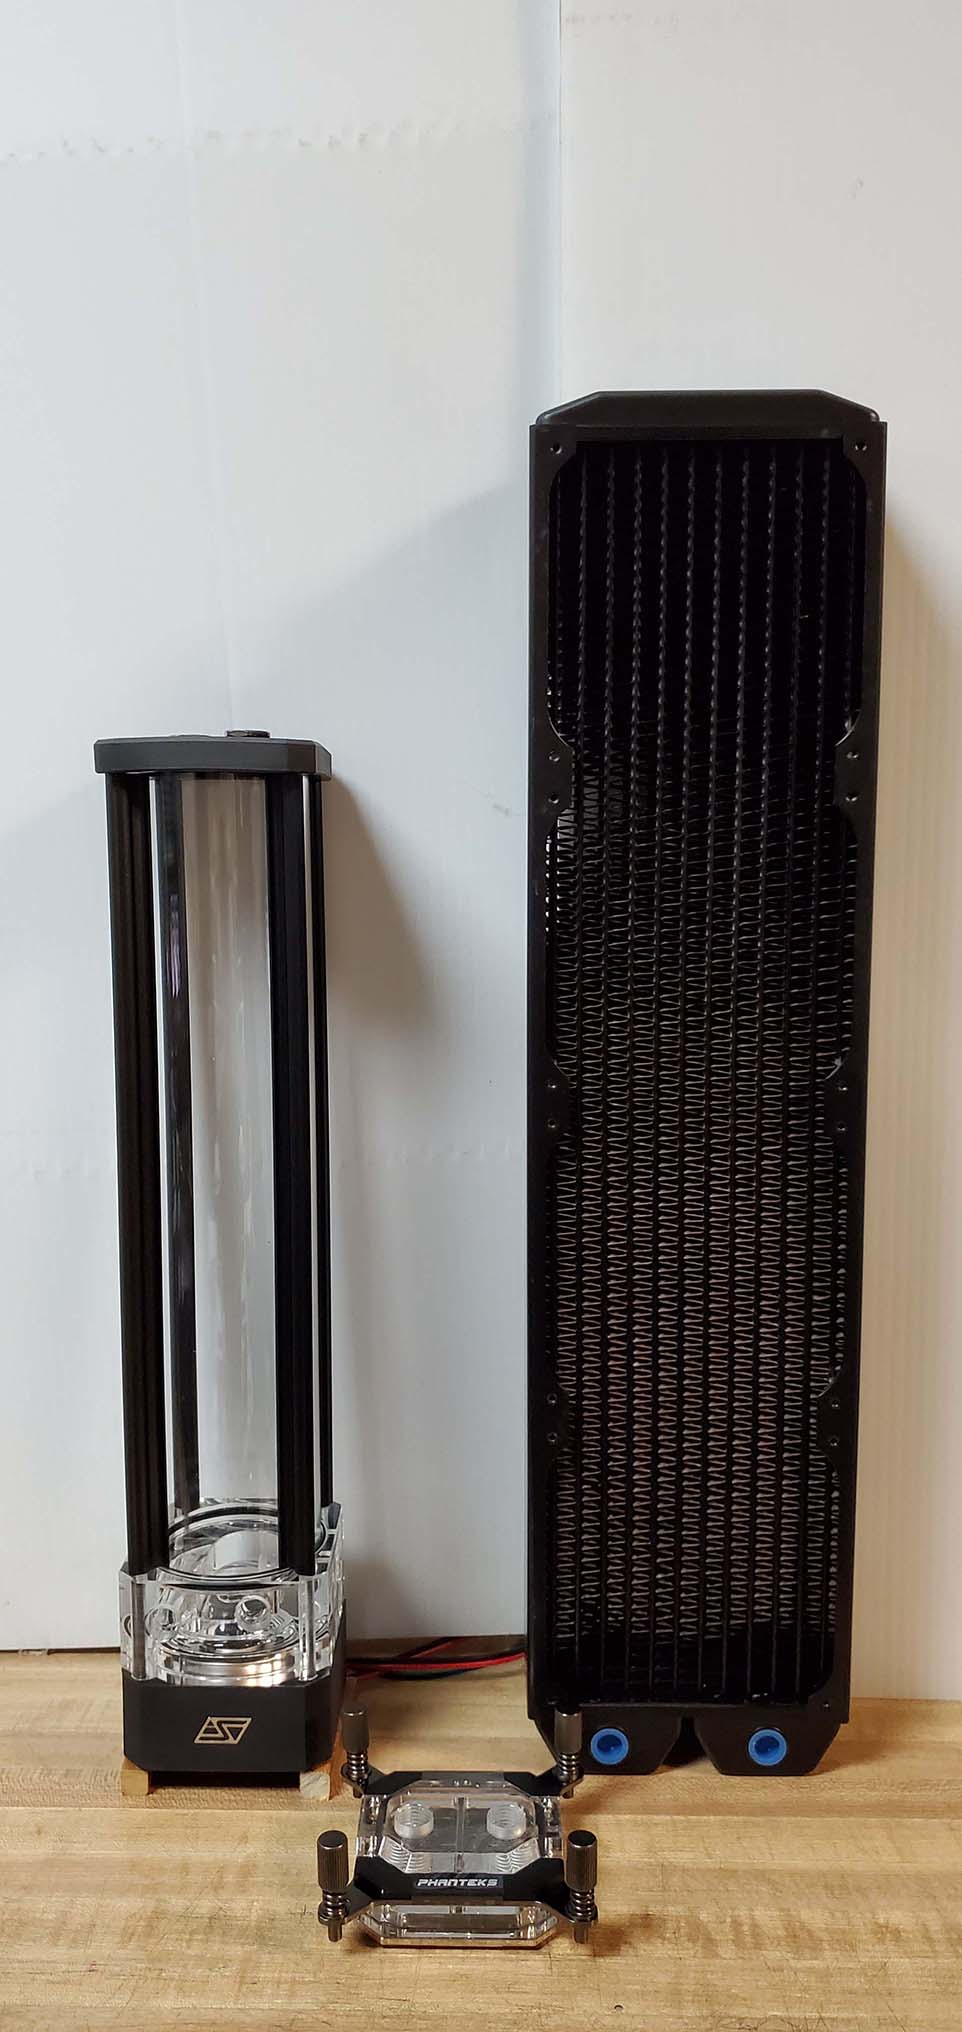
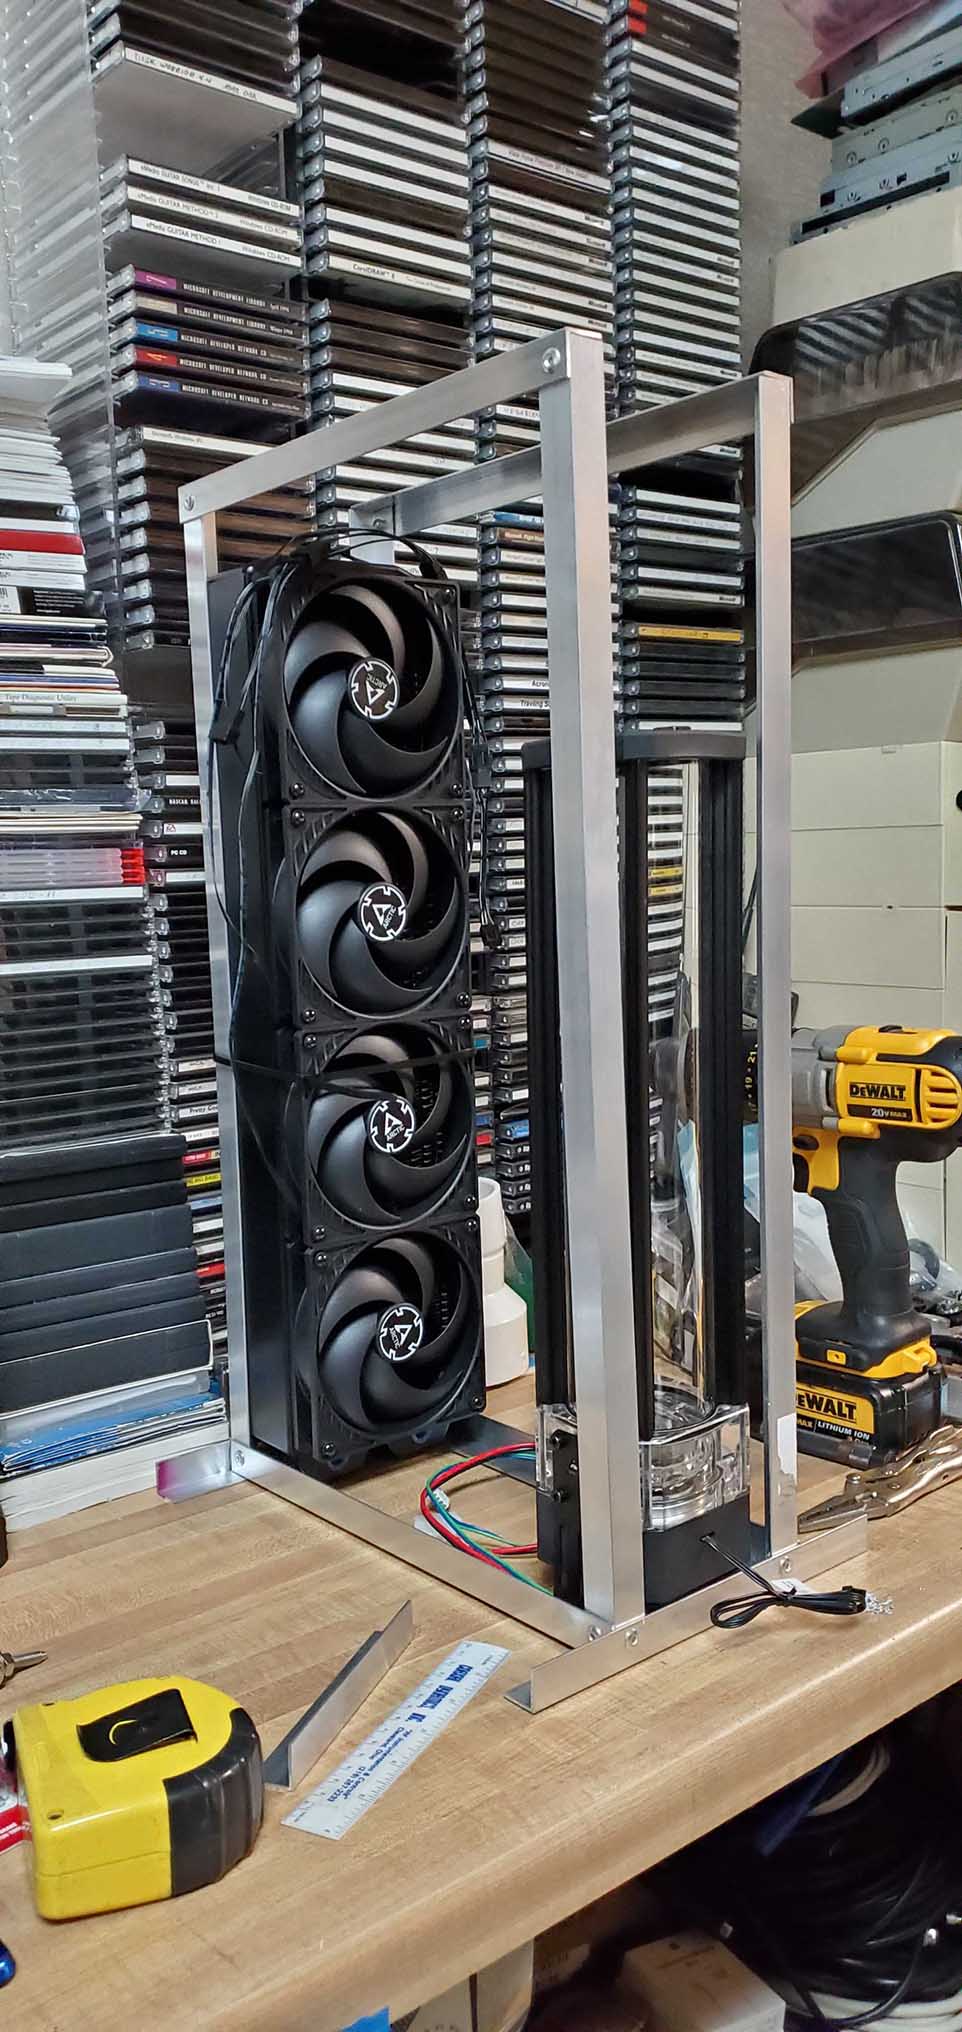
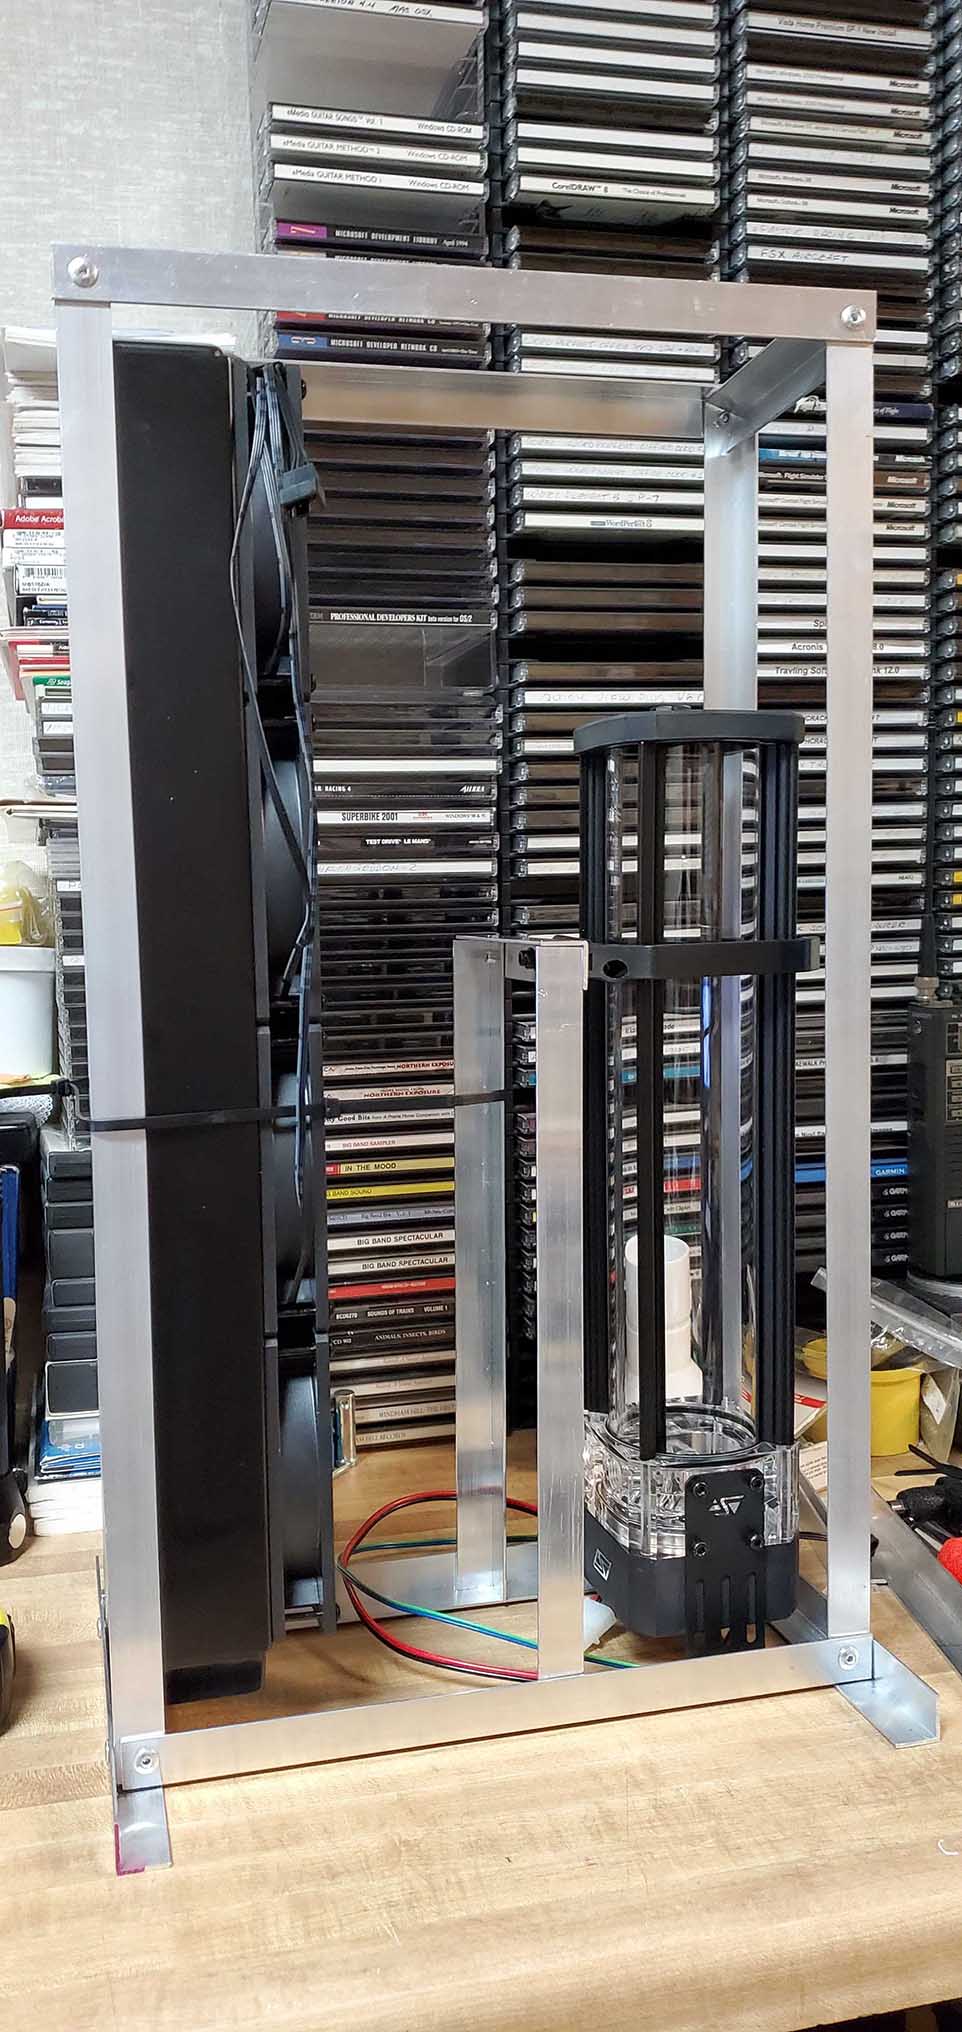
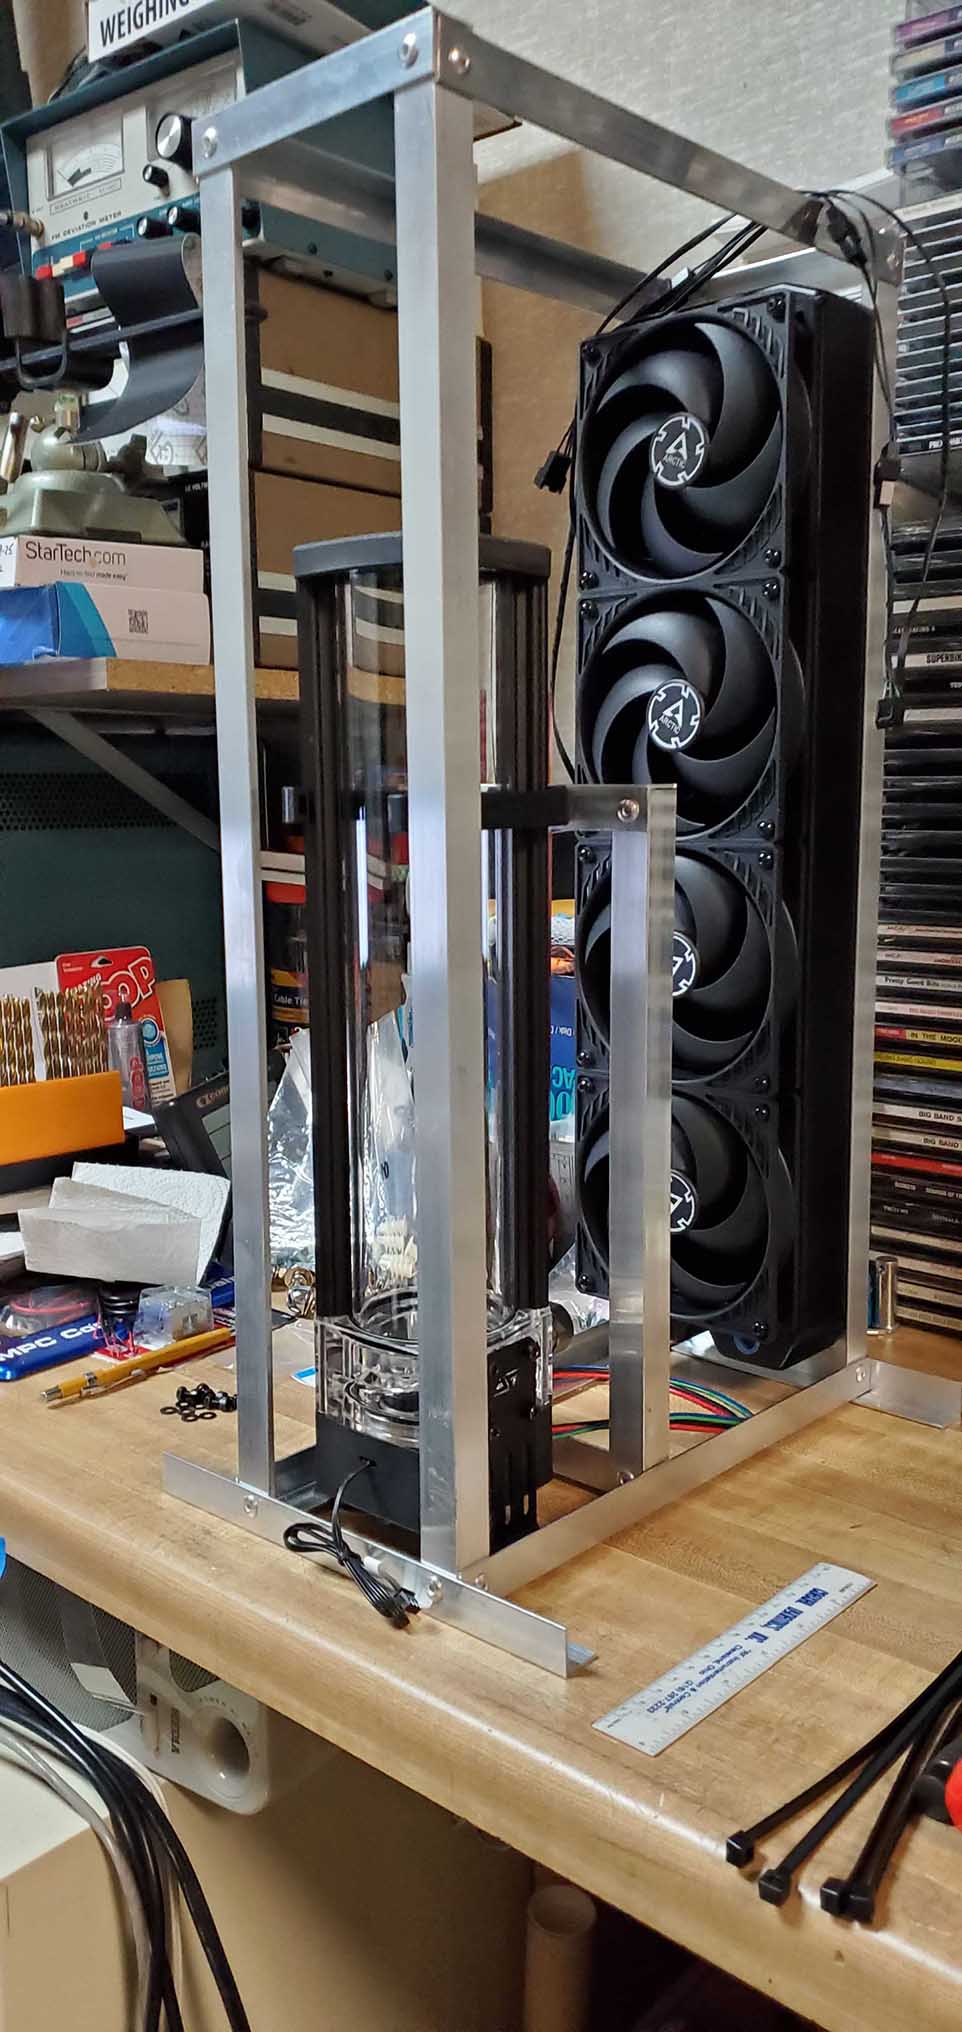
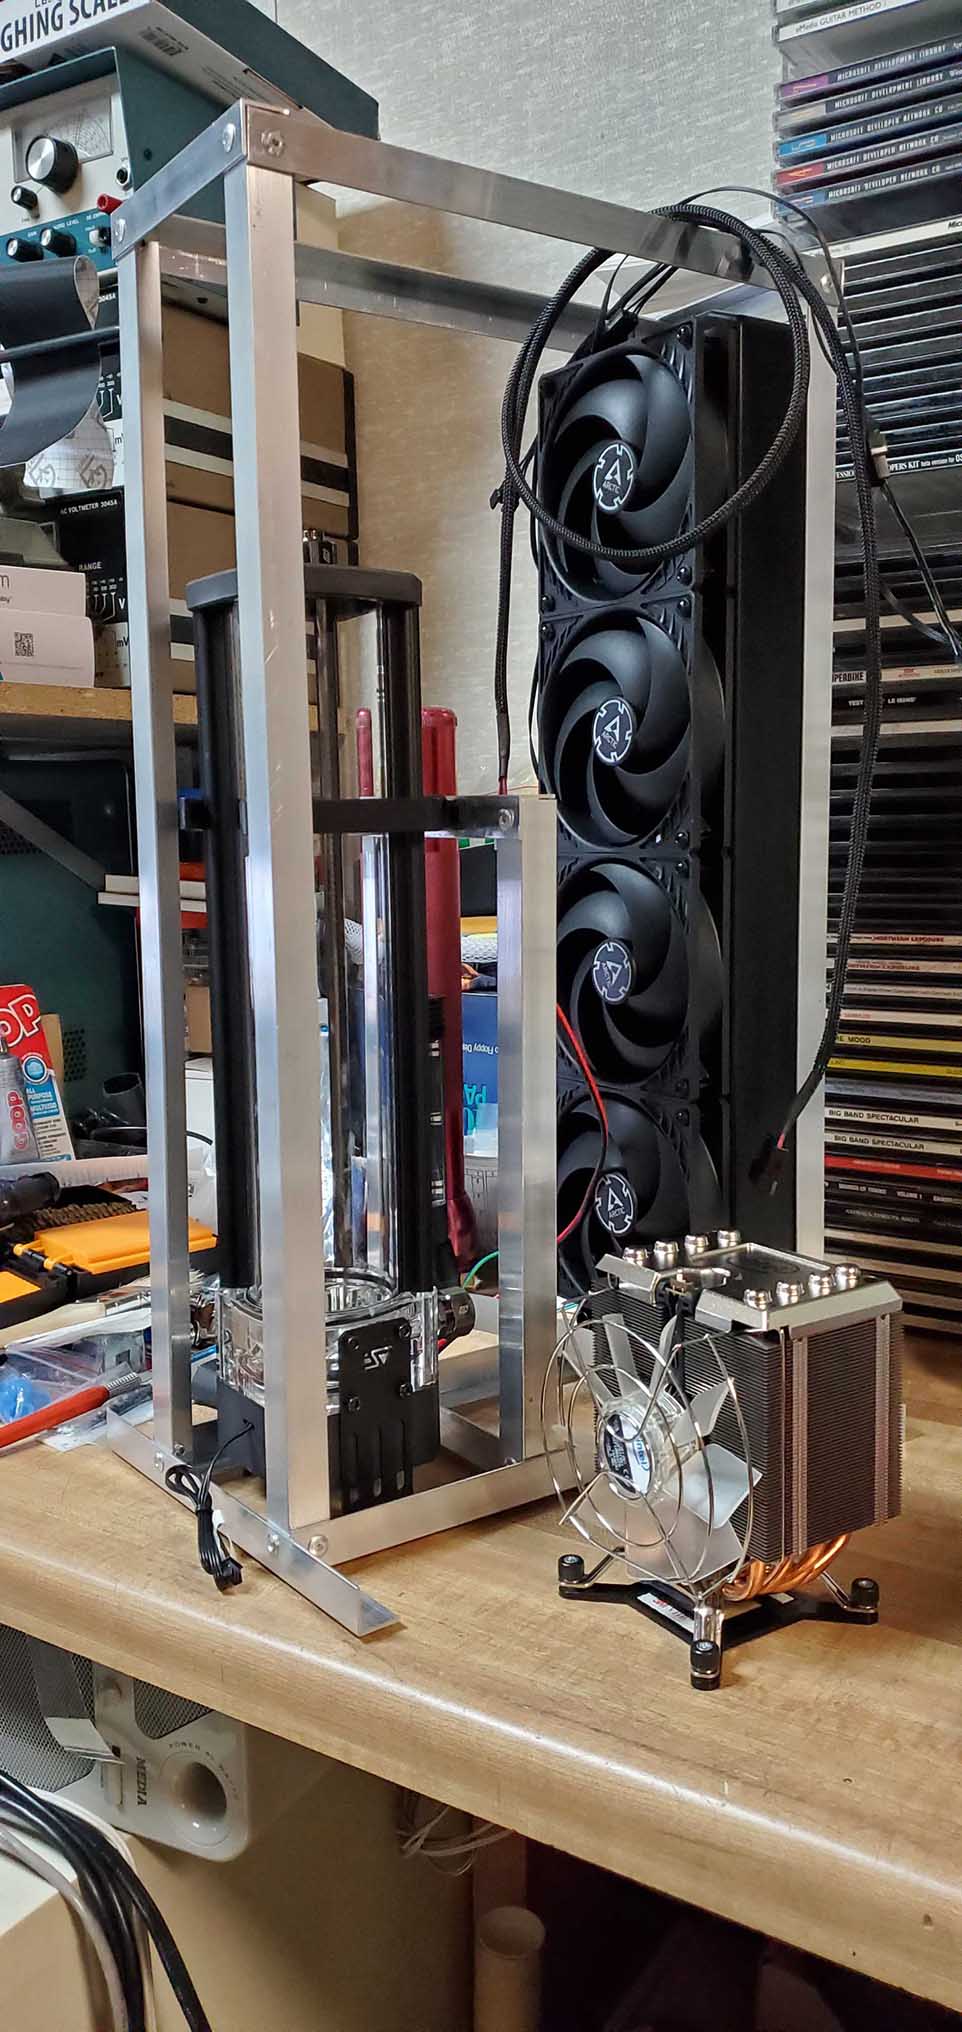
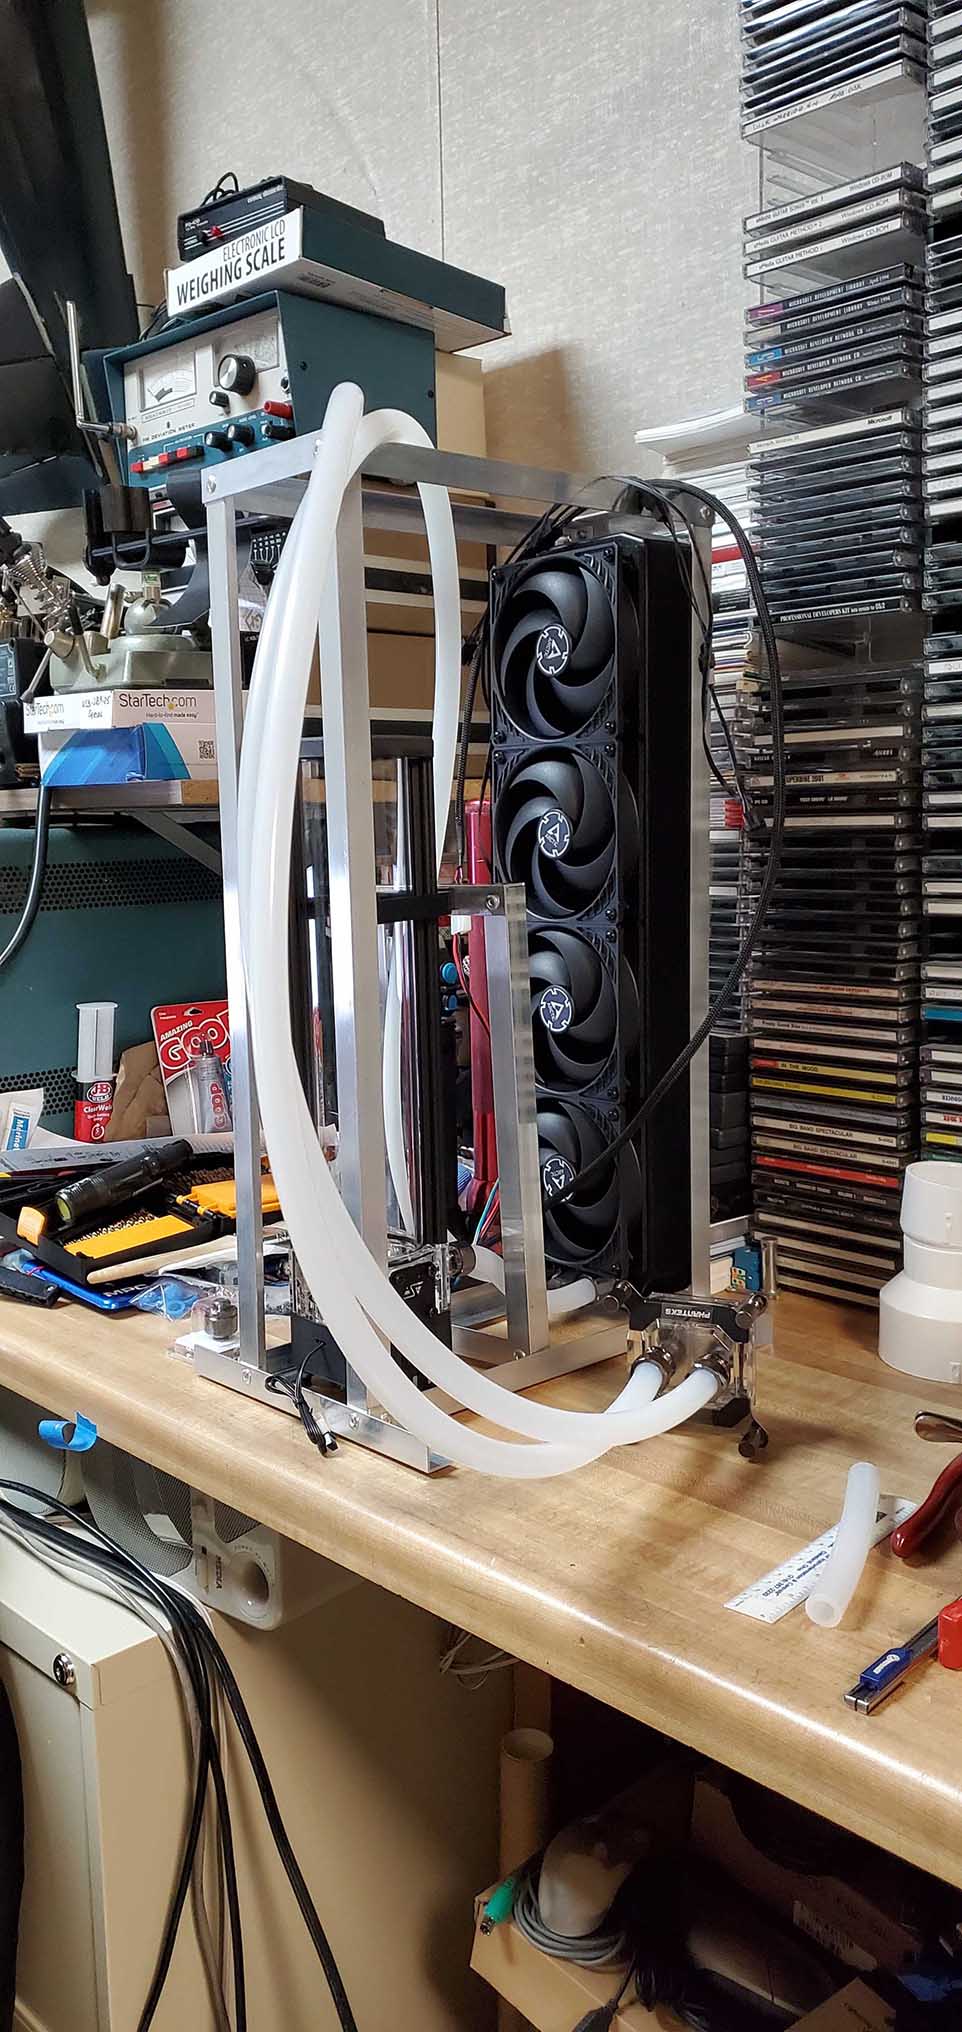
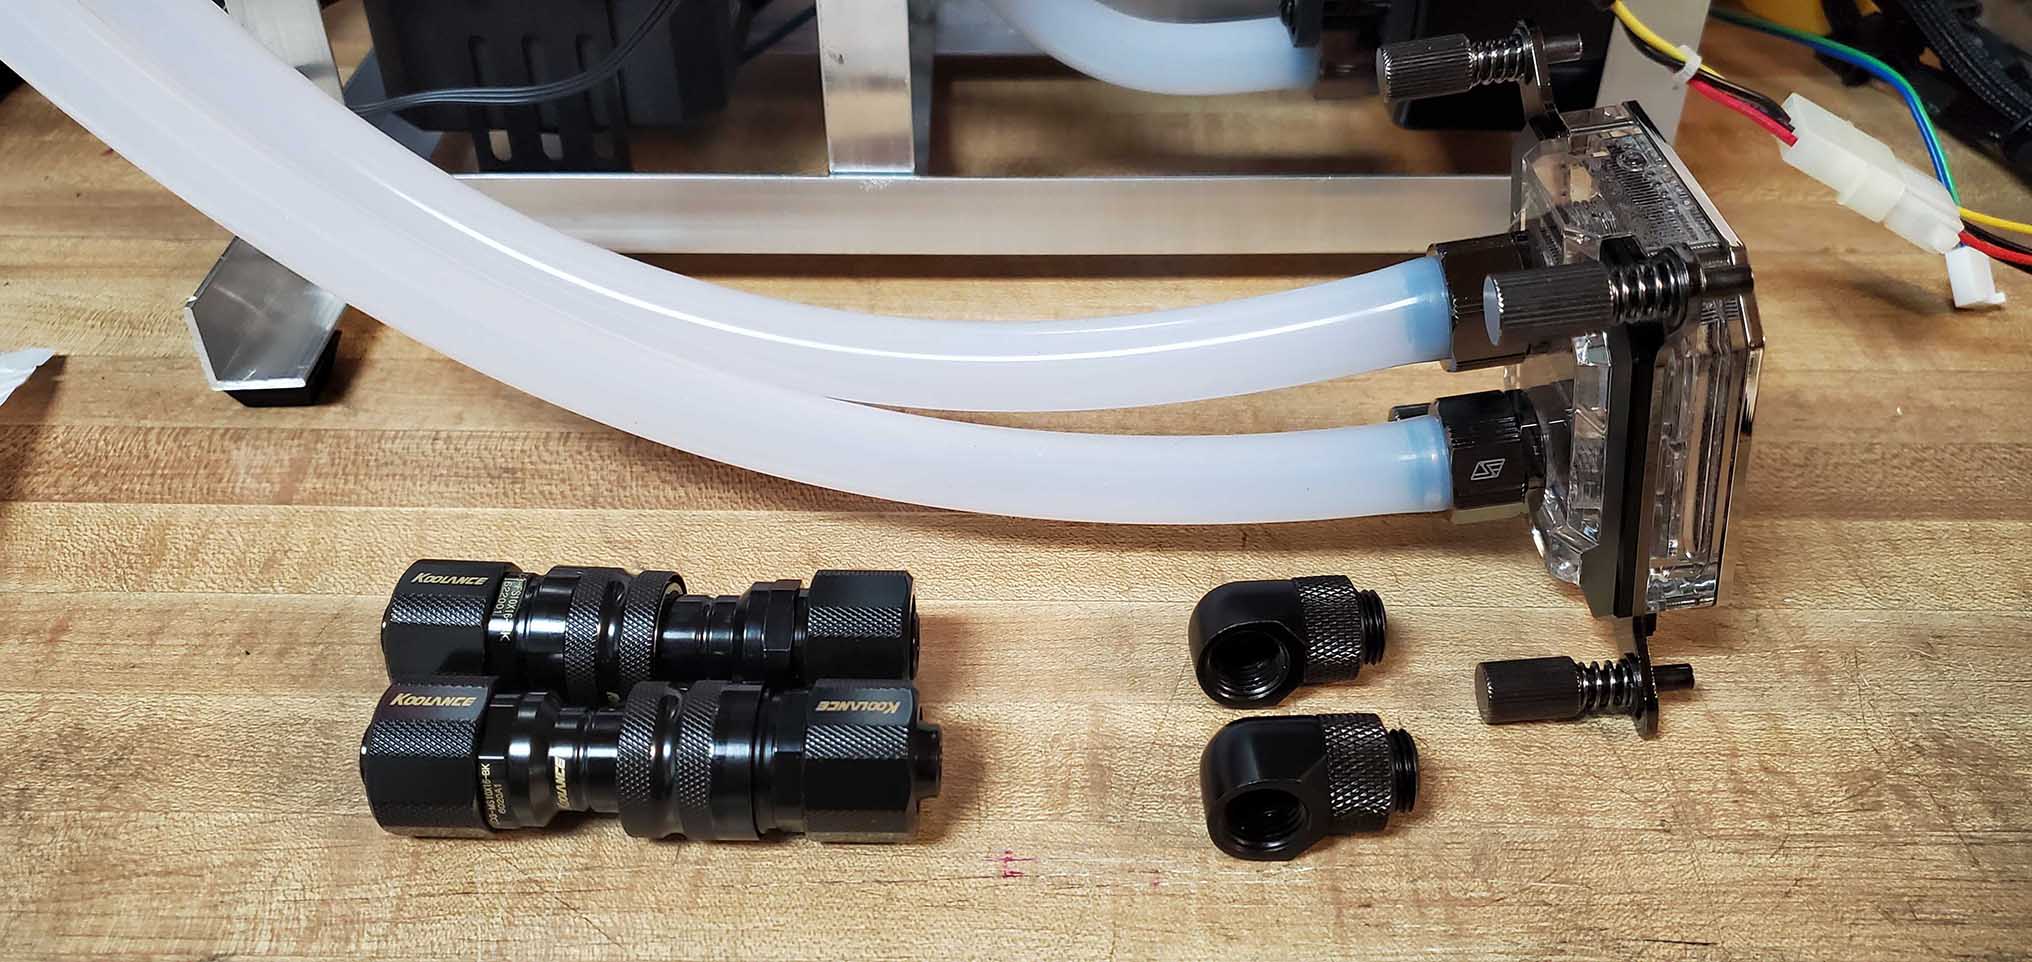
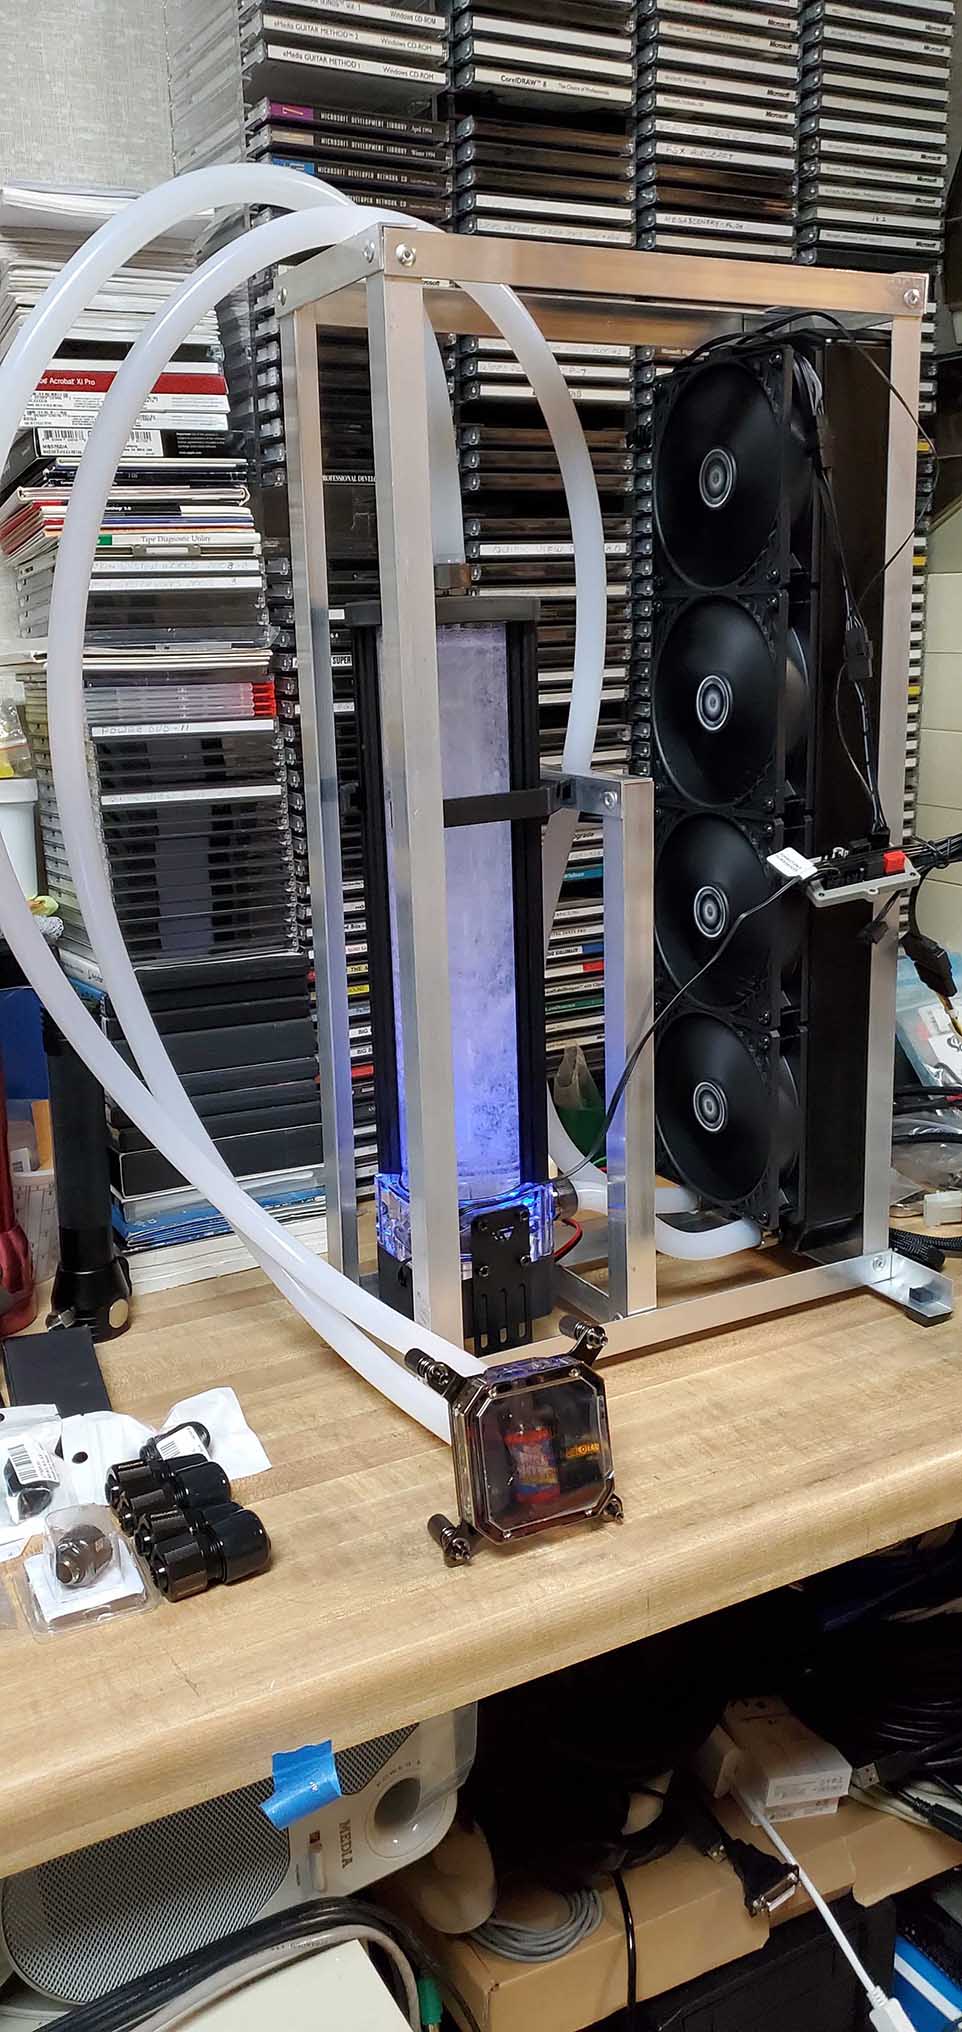
To ensure maximum future proofing we decided on a Alphacool NexXxoS UT60 Full Copper 480 cooling radiator that would support four 120 mm fans. Care was taken to select Arctic P12-PWM-PST-CO fans rated for radiator use for the best cooling. They are all connected to each other and then to a single fan controller. A Noctua NA-FC-1 fan controller controlls the 4 fans and is connected to a SATA connector on the PC power supply. The cooling pump is Swiftech Maelstrom-D5-V2-X300 with a large water reservoir for the greatest heat sink and dissipation. It requires a 4 pin molex power connector on the PC power supply, a 4 pin speed sensor connector and a RGB light connector. A Swiftech IRIS ECO V2 LED RGB controller to control the color and light display in the cooling pump. It requires a SATA power connector on the PC power supply. DERPIPE 3/8ID x 5/8 OD (10/16mm) thick wall Silicone Tubing to connect the pump, radiator and cpu waterblock. A Phanteks Glacier C350i CPU waterblock was chosen for our Intel CPU. To simplify power connections, a seperate small PC power supply can be used to power the water cooler. That is how we tested and are running our cooler. We may change that later.
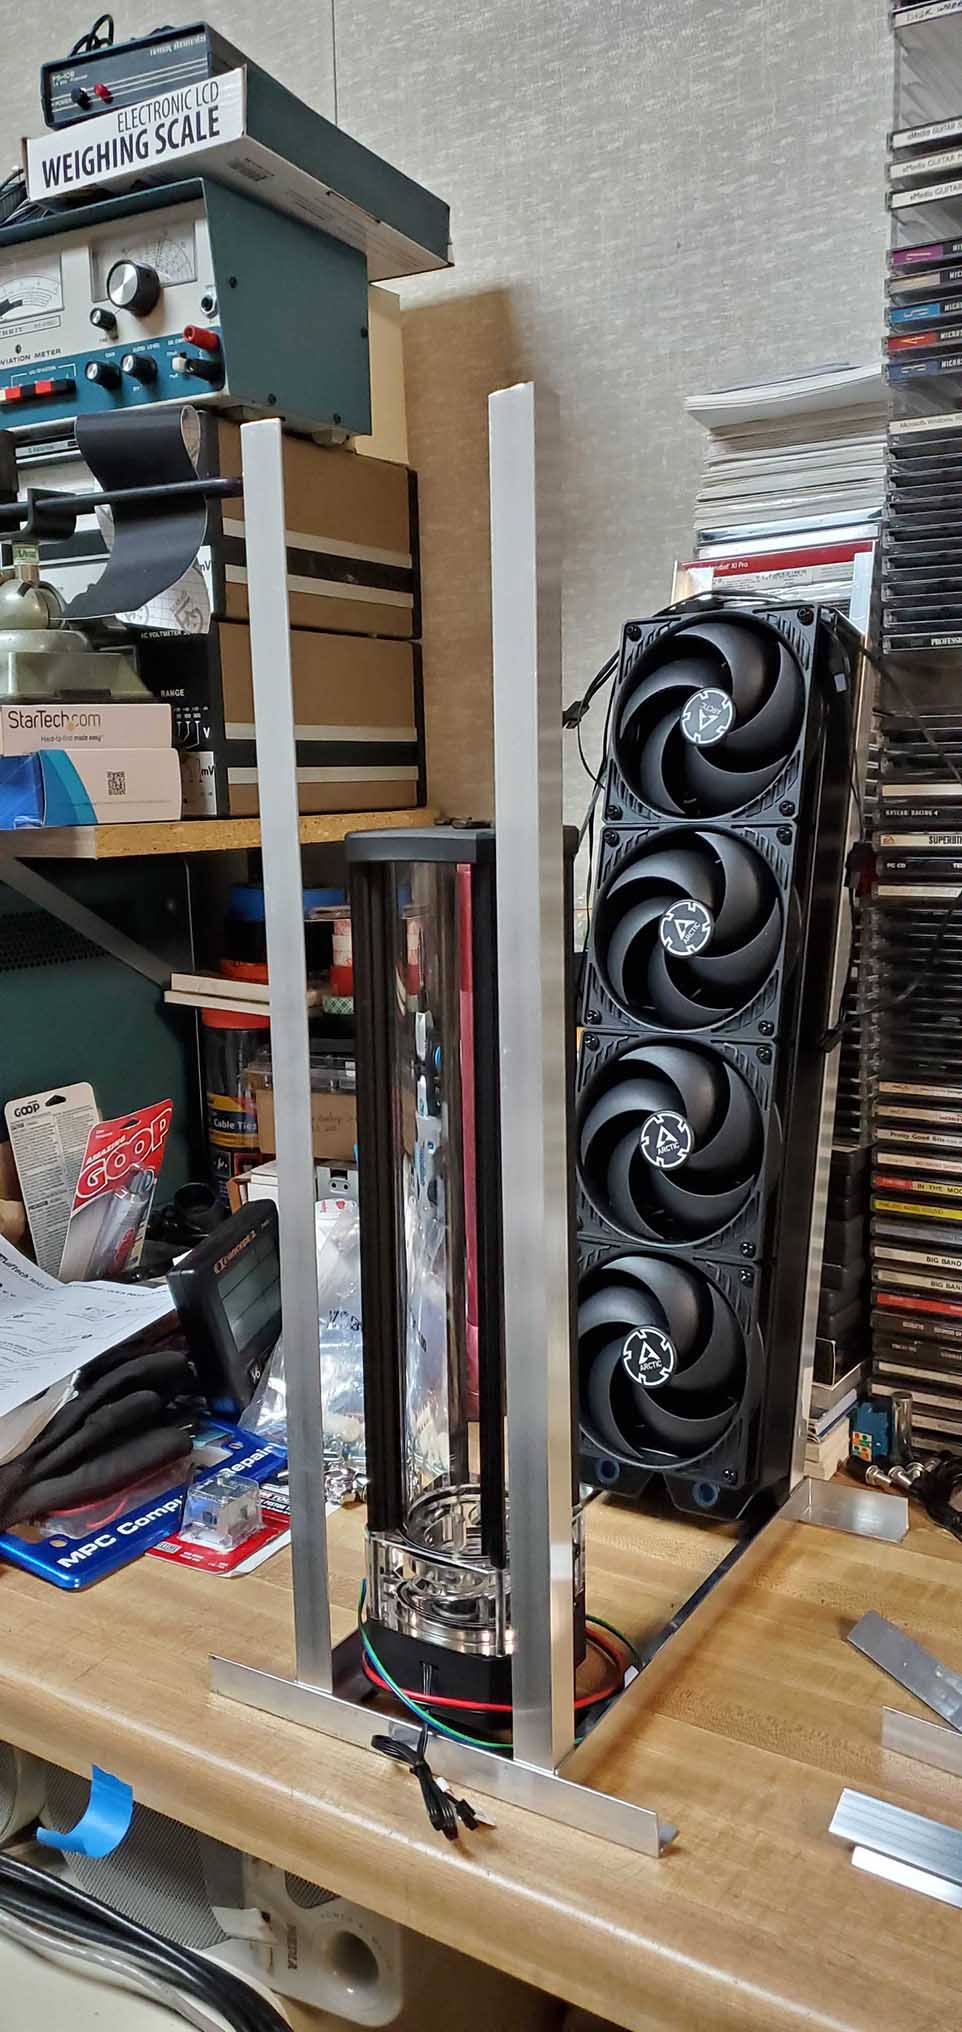
Initially we had thought about purchasing a mid sized PC case to build the CPU cooler into but ran into the same space issues as with our existing case, the radiator and fans would not fit. The decision was made to construct the cooler in a 'open frame' setup for maximum air flow. The material that best suited our needs was 3/4 inch aluminum angle. The height and width of the frame was determined by the size of the radiator. The depth was determined by the distance needed between the fans and the cooling pump and reservoir.
To eliminate corner braces we carfully cut all ends of the aluminum angle to 90 degrees and arranged them to interlock with each other. If you expand the photo below to full size you will see how this was done. Also notice that we decided to use large head aluminum rivits instead of nuts and bolts. This was done for ease of construction and a cleaner look. You can also use pan head screws with locknuts for almost the same look.
Because the cooling pump reservoir is quite tall it was decided to add some support with a secondary loop brace at the back of the pump. It was bolted to the main frame once the final position was determined.
For overall unit stability the bottom 'legs' of the box were extended 2 inches beyond the the sides of the box. Stick-on rubber feet were added later to provide clearance for the pump mounting screws in the bottom frame rails.
The stock cpu cooler pictured had nowhere near enough cooling capacity so we were using a Noctua NH-D15 cooler which worked fine at midrange overclocking but was not large enough for high end overclocking.
Initial testing was done with an external power supply and an add-on fan controller so that we could judge the amount of cooling and noise this configuration would generate. It does cool very well and is surprisingly quiet.
Because of the number of power connections needed, we decided to use a dedicated power supply for the water cooler. While we tested with a standard pc supply we replaced it with a physically smaller EVGA SuperNova 650 GM modular supply to reduce the cluttered look with the standard supply.
The primary reason for choosing this supply was its physical size which fits perfectly within the water cooler chassis. The 650w supply rating was chosen to 'future proof' this design.
The great warranty and the fact that we have a 1600w EVGA psu in the system this water cooler is being built for also made us lean toward this psu. An in-line Thermaltake Pacific TF2 water flow rate and temperature meter was added so that we could get accurate data on how the cooler was performing.
You need to expand the photo below to see how the monitor was mounted as it is supported only by the water lines.
We also added Koolance Dripless Quick Disconnect fittings to the water lines located outside of the computers case to eliminate any possible leakage on the motherboard. These connectors will also allow us to change CPU cooling blocks if desired or seperate the cooler from the computer without draining the water lines. We changed the straight Swiftech CPU cooling block connectors pictured to 45 degree connectors so that the water lines did not have to be bent too sharply to fit inside the computer case with its covers on. 90 degree connectors were also looked at but we thought that the sharp interior angle might have a negative impact on water flow.
A high mounted and recessed led lit power switch was used to avoid accidental power up or power shutdowns and to give a visual indication of the power status. If you expand the photo below you will see that there is a lot of turbulance and air bubbles in the water reservior. The result of that was the injection of air into the radiator greatly reducing its efficiency.
That problem was resolved by extending the water return line about 3 inches down into the water in the reservior. Check out the video below to see the difference. For the best view of the video below you may need to click on the expansion box on the lower right side of the player. |